The Ultimate Guide To Changing A Flat Tire

If you’ve discovered this how-to guide that likely means you’re on your mobile phone right now somewhere on the side of the road. You’re frantically trying to find some easy to understand steps for changing a tire that just went flat at the worst possible time. It happens but don’t worry, we’re here to help! In this guide you’ll find some basic step-by-step instructions for how to change a flat tire so you can resume your day with just the normal amount of stress. Whether you drive a new mercedes-benz or something a lot less stylish, flat tires happen to everybody and we’re going to walk you through it.
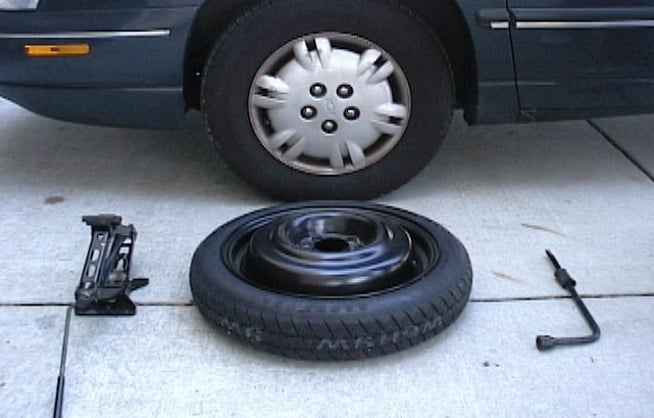
A Few Things You’ll Need
Repairing your flat might seem daunting but it’s usually a straightforward task once you round up the necessary equipment which include your jack, wrench, and spare tire. Typically you’ll find these somewhere in the trunk. If you drive a truck the tools will usually be located underneath the rear-seats, and for vans there should be side compartments in the rear cargo area. Another note for van drivers is that you spare tire might be located underneath the front of the vehicle if you have the stow n’ go feature for your rear seating. If you’re unsure you can always read through your owner’s manual to get specific instructions for your vehicle. Some other tools and items that could be beneficial include:
- Flashlight
- Gloves
- Something to kneel on to avoid getting all dirty ( you might be on your way to work )
- A raincoat can also be a beautiful thing if you get caught in some weather
- You might want to include these in your emergency car kit
So Easy Even You Can Do It
Ok now that we’re ready – here’s 10 basic steps to finish the job like a seasoned professional
- Find a safe place to park. Don’t be one of those folks narrowly avoiding traffic when you change your flat – that’s generally a bad idea! If you’re unable to make it to the nearest exit or turn off then pull as far onto the shoulder as you’re able to.
- Remember your hazards. Turning on those hazards is a must to enhance your visibility so that other commuters see you
- Gather Your Tools. It’s time to find the jack and other tools we mentioned earlier
- Left = Loose.Don’t take them off at this step but loosen up your lug nuts while your tire is still on the ground. It’s easier to get the torque when your tire isn’t moving
- Jack of all trades.You might want to revisit your owner’s manual to identify if there’s a best point to jack your car up from. Get the jack solidly under your car frame and let’s get that thing in the air
- Off with the lugs.Finish what you started in step 4 and get those lug nuts off.
- Take the flat tire off.With the lugs removed you should be able to take the tire off the axle. It’s not uncommon for them to get a little stuck so you might have to provide a good kick for motivation.
- Put the spare on. With the flat out of the way you can put the spare tire on at this point. Get the lugs started but don’t tighten them all the way until the car is back on the ground.
- Almost there. You can lower your vehicle down and put away your jack. The general wisdom is to tighten the lugs 50% in a diagonal pattern to keep it even and more secure. After all the lugs are on you can use the same pattern to finish the job at 100% tight.
- Wrap up. Load up your flat tire and anything else you used. Congratulations, you’re ready to get back on the road!
Final Suggestions
That wasn’t so bad was it? Please note that drivers who don’t have a full size spare ( also known as a donut ) should pay attention to the speed limit outlined in their manual. Those tires have limitations and it’s advised you don’t try to exceed them. At your earliest convenience you can visit your local new or pre-owned dealership or auto shop to get your flat tire repaired and installed safely. That’s it, the nightmare is over, at least until next time.
Related Post

A Crash Course In Carkeeping: Lengthen The Lifespan Of Your Vehicle
Source: Wikimedia Since your car is such a big investment, you’ll want to get the [...]
Car Repossession: What to Do Before and After
Most customers do not pay attention to the importance of keeping up to date with [...]